

Make a modular hexagonal tray with the CNC function in Snapmaker 3-in-1 3D Printer
Hi makers,
In the past two weeks, we have shared two examples of incorporating 3D printing and laser engraving into teaching. We hope you are inspired in one way or another! This article is the last tutorial in this series, guiding you on how to make a hexagonal tray with the CNC function in Snapmaker 3-in-1 3D printer.
First, instead of simply starting to make this tray, a teacher or parent can encourage students to dig into the design and form of this tray. To facilitate your teaching, we have prepared several examples of questions you can ask to form an instructive dialogue between you and your students.
Question 1: Why do we design the tray in a hexagonal shape? What are the features of a hexagonal structure?
Answer 1: The hexagonal structure generally has several advantages. First, when polygons such as circles or pentagons are used to join with each other in a plane, there will be gaps in the middle. Only triangles, quadrilaterals, and hexagons have no gaps in between when joined together.
Question 2: But why do we choose hexagons instead of triangles or quads?
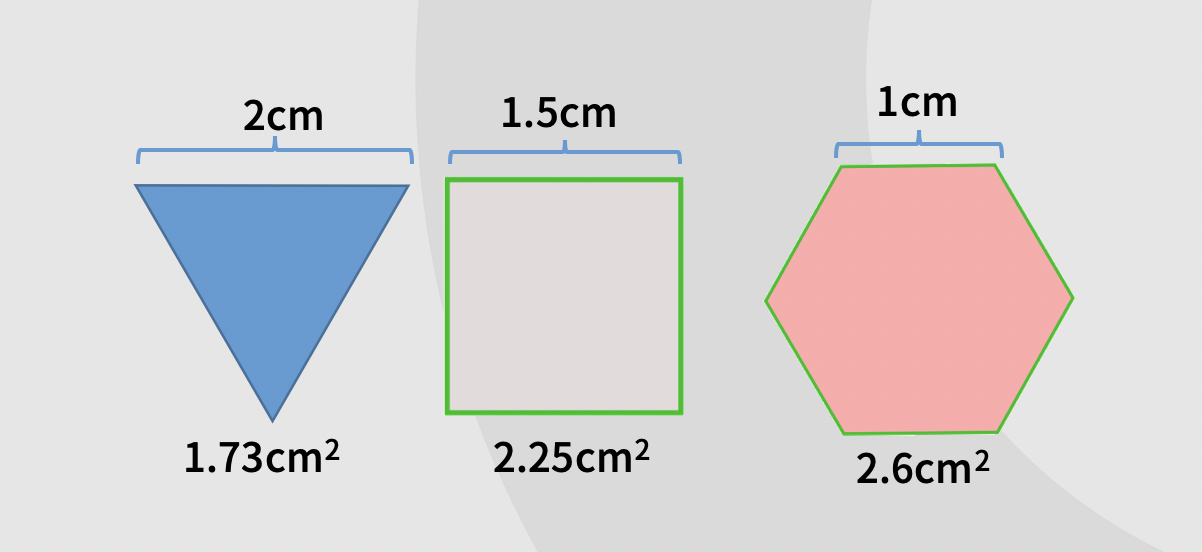
Answer 2: This is because compared to the triangle and square, the perimeter of the hexagon is the least when the same area of the plane is laid out, which means a larger area can be enclosed when the same amount of material is used. For example, we now have a 6cm line to enclose a flat surface. If it is a triangle, then the side length measures 2cm, which is able to enclose an area of 1.73 square centimeters. If it is a square, the side length is 1.5cm and it can enclose an area of 2.25 square centimeters. On the other hand, a hexagon with a side length of 1cm can enclose an area of 2.6 square centimeters, making it the largest of the three. Therefore, by using a hexagon you can cover the same area with less material.
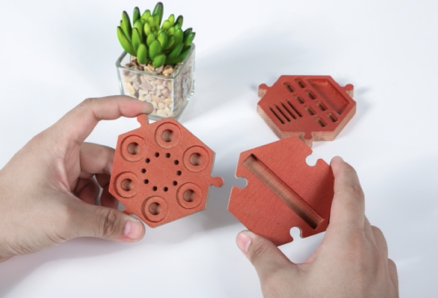
Question 3: Now, you have got to know some basics of hexagonal structure. Take a look at my design of a modular hexagonal tray. What is special about it?
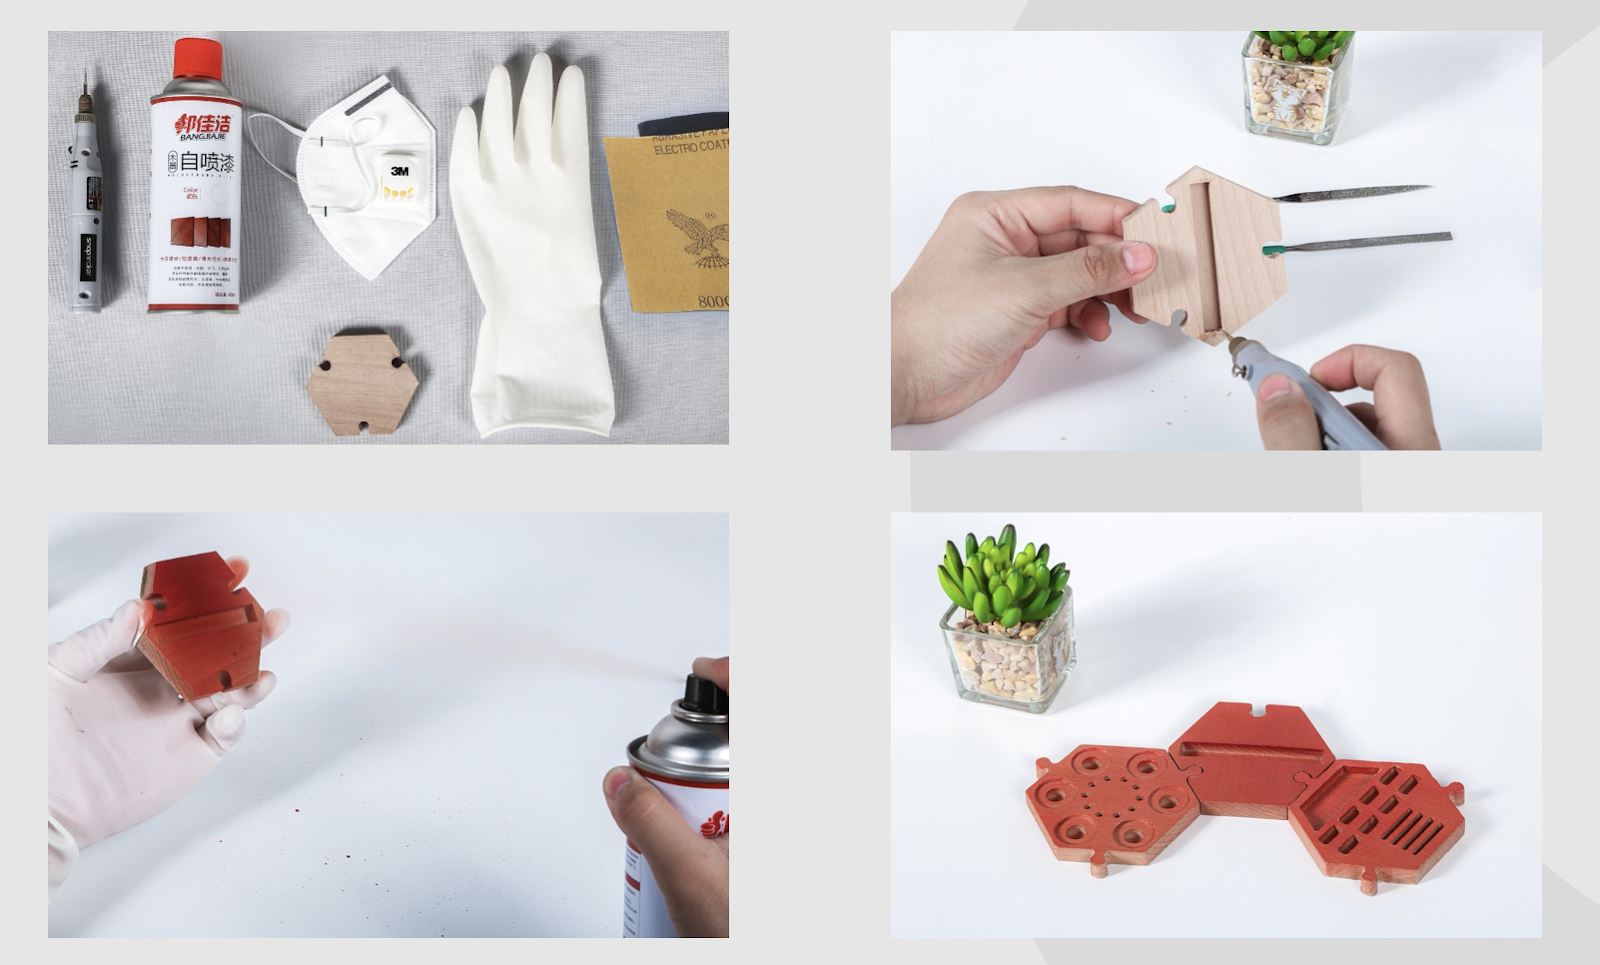
Answer 3: In order to make the tray modular, we need to design a joint structure to connect each hexagon. Mortise and tenon joints are used in this particular design. We can further use Inkscape to design the vector images.
After students have a basic sense of what is under the hood, a teacher can further guide them on getting their hands on Snapmaker Luban and starting the carving job!
For your reference, we have prepared files for a tray that can be used as a phone holder. Link: https://drive.google.com/drive/folders/1lRBQH6xTHwTFW5tJi5ORt5pELKalLd-L?usp=share_link
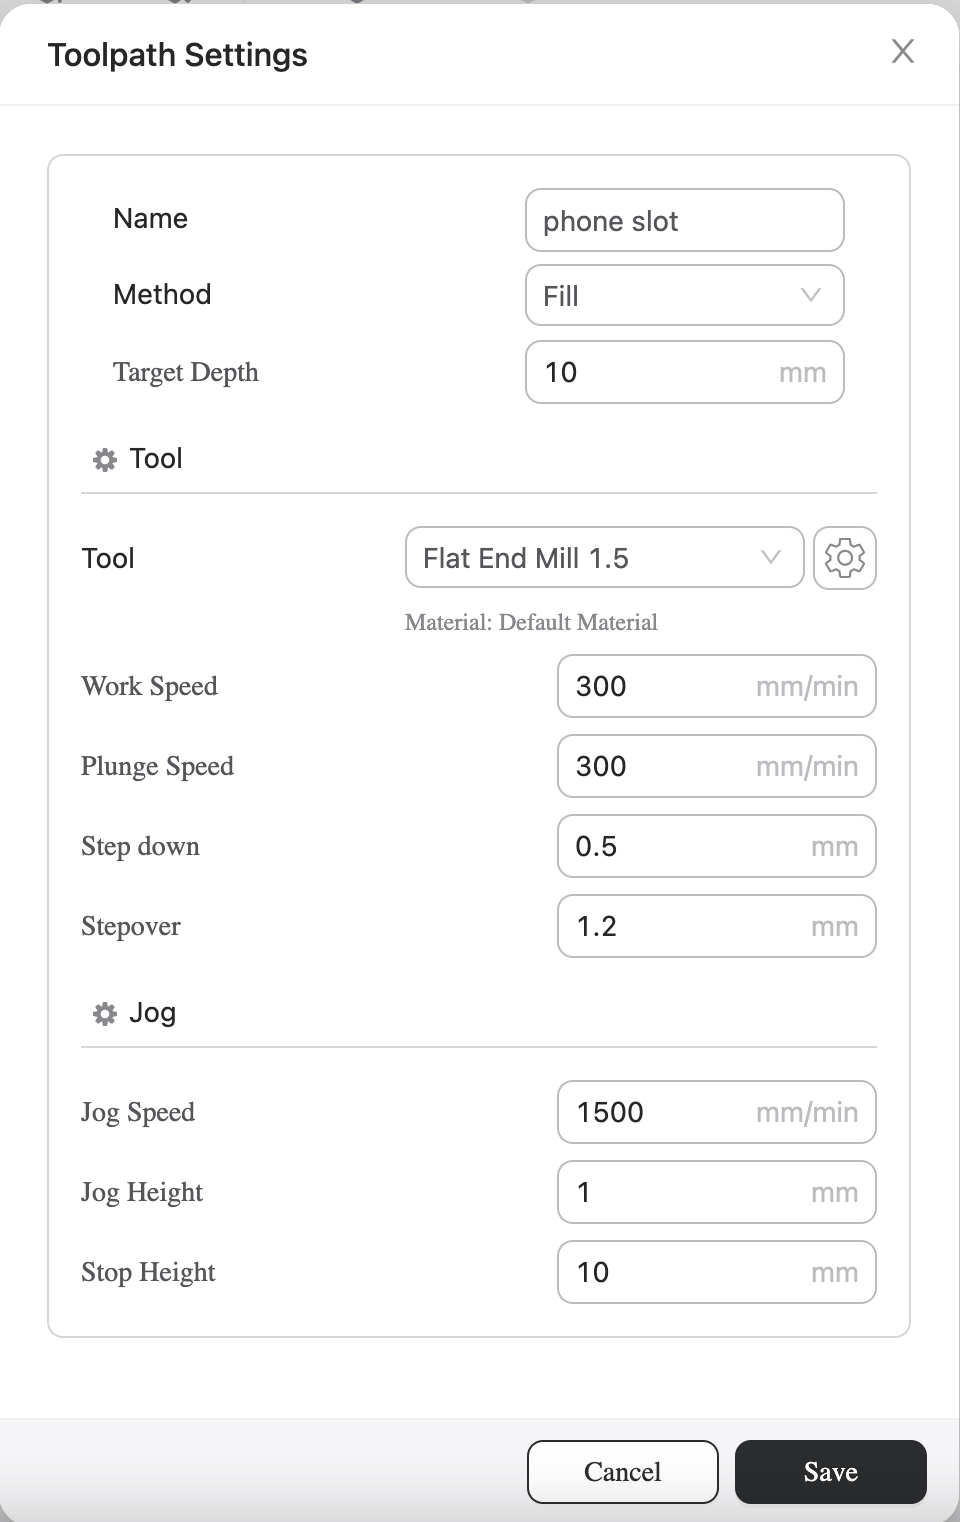
Now let’s see how to set the CNC machining settings in Luban. Let’s start by importing the “phone slot.svg”. Since we are going to do the grooving job, we need to create a toolpath named “phone slot”. “Method” is set to “Fill”, “Target Depth” is set to “10mm”, “Tool” is set to “Flat End Mill (1.5mm)”. Other parameters remain unchanged, then save the settings.
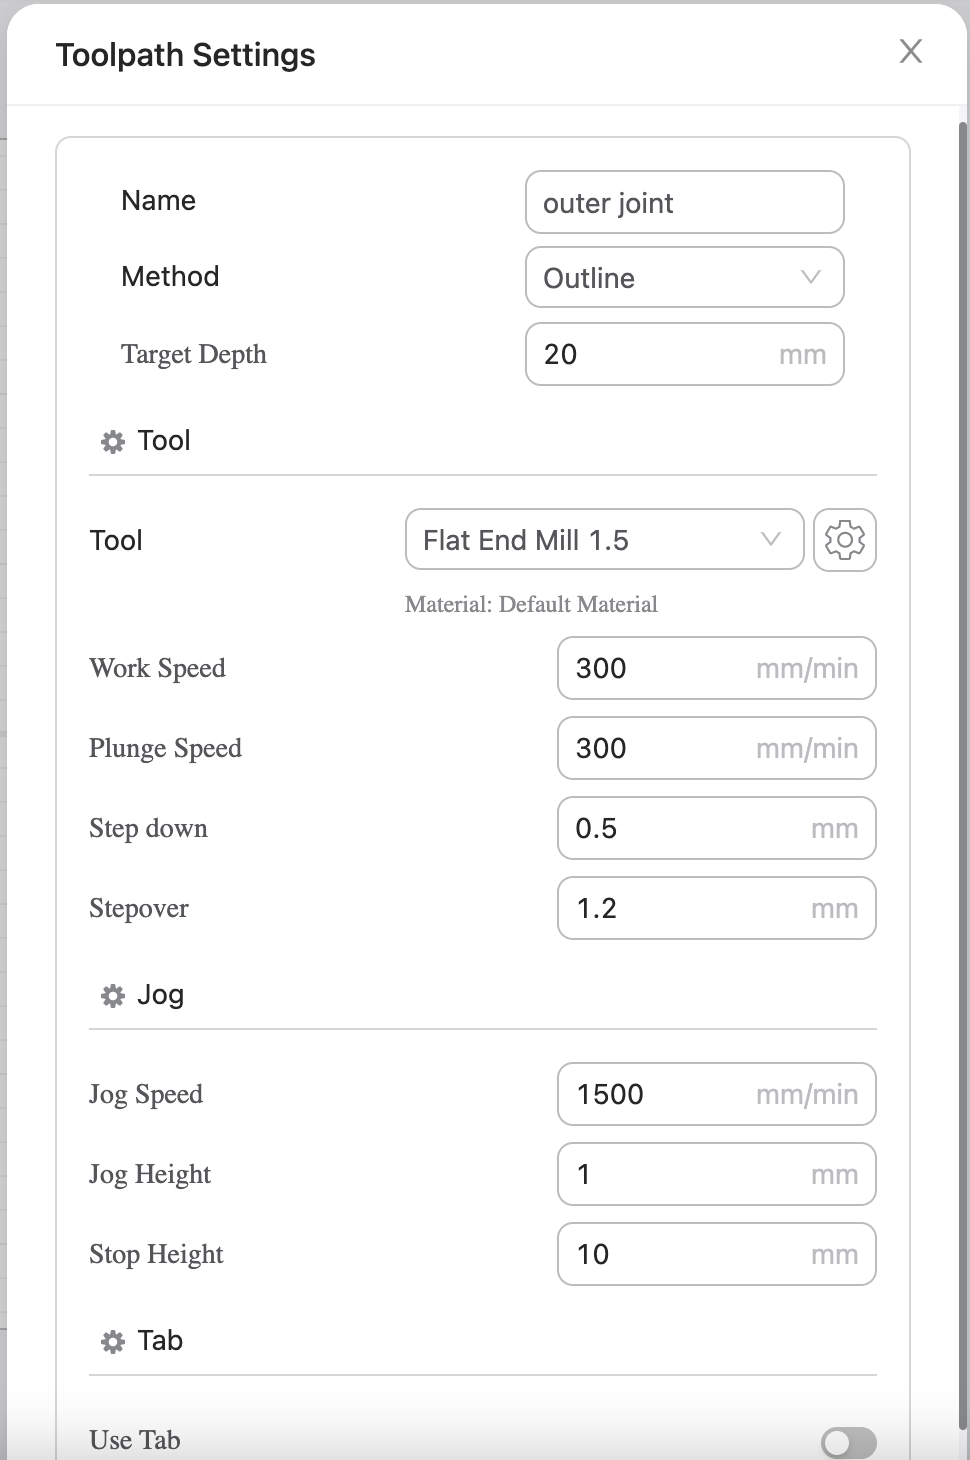
Next, import the “outer joint.svg” and create a toolpath named “outer joint”. “Method” is set to “Outline”, and “Target Depth” is set to “20mm”, which is the thickness of the material. “Tool” is set to “Flat End Mill (1.5mm)”. Other parameters remain the same, then save the settings.
Then we can generate the G-code and send it to the printer to start machining! You can make multiple trays, slot them together, and post-process them in the way you like!
If you are amazed by the versatility of this 3-in-1 3D printer, don’t forget to check out our Back-to-School Sale. Find the best deals, and start learning by making today!


